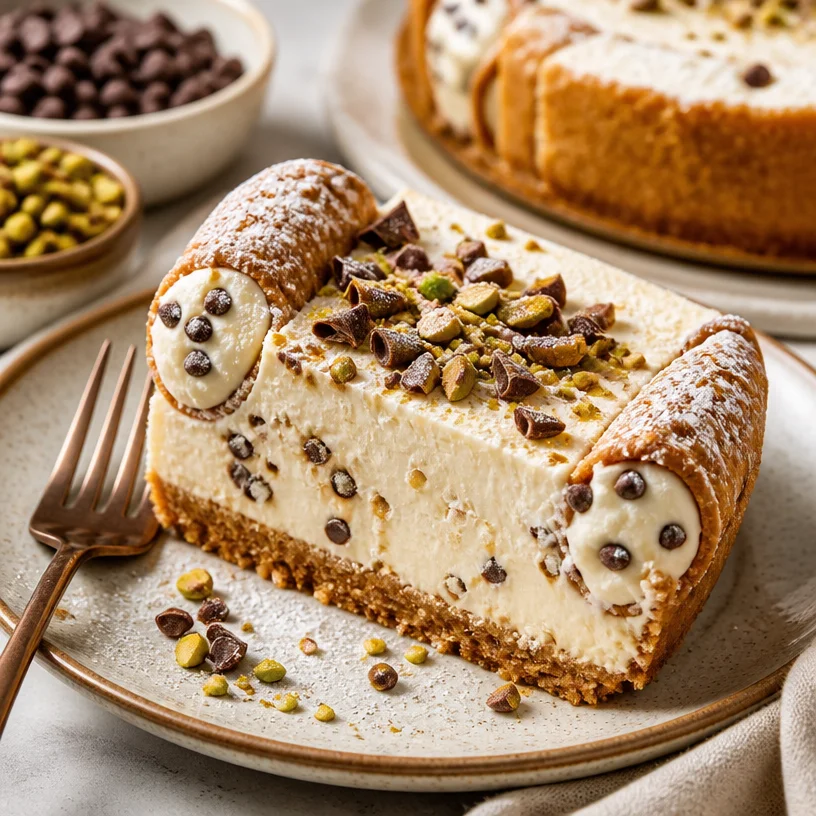
Indulge in Crunchy Delights: Protein Italian Cannoli Cheesecake Recipe
Hey there, food friends! Welcome back to Crunchy Table, where each dish is a vibrant blend of flavor, texture, and a whole lot of fun! Today, I’m excited to take you on a delicious journey of creating the ultimate Protein Italian Cannoli Cheesecake. Yes, you heard it right—cannoli and cheesecake coming together in one scrumptious slice of heaven!
A Slice of Nostalgia
Let me take you back to my childhood, where Sundays were always a big deal in my family—not just because of the end of the week, but because it was dessert day! Picture this: the kitchen filled with the smell of freshly baked goods, my grandma bustling about, and the excited chatter of family. One of the highlights was her legendary cannoli. Crispy shells filled with sweet, creamy ricotta, chocolate chips, and a dusting of powdered sugar made my taste buds dance!
However, as I grew older and became more health-conscious, I felt torn between my love for those glorious treats and wanting to maintain a balanced lifestyle. Enter: the genius idea of a Protein Italian Cannoli Cheesecake. It offers all the nostalgia of my childhood while upping the protein game and using healthier ingredients. It’s my way of giving a big, hearty hug to all those sweet memories, with a crunchy twist!
Ingredients
Here’s what you’ll need to whip up this dreamy dessert that has just the right amount of crunch and conditioning!
-
1 cup Greek yogurt or cottage cheese
A creamy base that adds protein and pairs beautifully with the sweet flavors. If you want a dairy-free option, try using cashew yogurt. -
1 scoop protein powder
Choose a flavor you love—vanilla or chocolate works great! This ingredient amps up the protein content, making this cheesecake not just a treat but a nutritious choice. You can skip this if you want a less protein-packed version. -
8 oz light cream cheese
This gives the cheesecake its delightful creaminess without all the calories. Philadephia’s light cream cheese is a great option. For vegan alternatives, try a cashew-based cream cheese. -
Premium flavor ingredients
This includes things like vanilla extract, lemon zest (adds brightness!), and a sprinkle of cinnamon for a hint of warmth and spice. Don’t skimp on quality; it really makes a difference! -
Natural sweetener (like honey, maple syrup, or stevia)
Sweeten it to your taste! Remember, since we love a good crunch around here, you can always use less sweetener and add some crunchy toppings instead.
Step-by-Step Instructions
Alright, let’s roll up our sleeves and get cracking on this delightful dessert. Follow these steps to take your cheesecake from dream to reality:
-
Prepare the Base:
Start by preheating your oven to 350°F (175°C). Grab a round 9-inch springform pan and lightly grease it. This is crucial for preventing sticking (and nobody likes a stubborn cheesecake!). -
Blend the Cream Cheese:
In a mixing bowl, beat the light cream cheese until smooth. You want it creamy and fluffy! This is the base for your cheesecake and really needs to shine. Don’t skip this step; the texture depends on it! -
Add the Yogurt & Protein Powder:
Slowly mix in your Greek yogurt (or cottage cheese) and protein powder. Beat until everything is well-combined and the mixture is nice and smooth. If it’s a bit thick, don’t worry—this is a cheesecake after all! -
Sweeten It Up:
Now it’s time to add your natural sweetener, vanilla extract, lemon zest, and a hint of cinnamon. Mix until thoroughly combined. Give it a taste and adjust the sweetness to your preference—remember that flavors often amplify while baking. -
Pour and Bake:
Pour your luscious filling into the prepared springform pan and spread it evenly. Bake in the preheated oven for about 25-30 minutes, or until the edges are set and the center has a slight jiggle—it’ll firm up as it cools. -
Cool and Chill:
Let the cheesecake cool at room temperature for about an hour, then transfer it to the fridge to chill for at least 3 hours, or ideally overnight. This chilling step is crucial for the flavors to meld and develop while allowing the cheesecake to set properly. -
Serve It Up:
When ready to serve, carefully remove the cheesecake from the springform pan. You can garnish it with mini chocolate chips, crushed nuts, or a sprinkle of cinnamon for that added crunch factor that we love here at Crunchy Table!
Serving Suggestions
Serving is where we can really start to get creative! For that Instagram-worthy moment, consider these serving options:
-
Slice and Serve: Slice the cheesecake into wedges and plate with a dollop of Greek yogurt and a sprinkle of nuts.
-
Cheesecake Parfaits: Layer the cheesecake in a glass with some fresh berries and a crunchy topping for a fun, individual treat.
-
Dessert Board: Create a dessert board with assorted toppings like fresh fruits, chocolate chips, and nut butters for guests to customize their slice.
Recipe Variations
Let’s shake things up a bit, shall we? Here are some creative twists to put your own spin on this base recipe:
-
Chocolate Cannoli Cheesecake: Add cocoa powder to the filling for a decadent chocolate twist.
-
Nutty Delight: Fold in chopped nuts into the cheesecake batter for extra texture or crunchy toppings when serving.
-
Fruit Infusion: Incorporate some pureed fruit (strawberry, raspberry, or cherry) into the filling for a fruity twist.
-
Toppings Galore: Experiment with different crunchy toppings like granola, toasted coconut, or crushed graham crackers for an added layer of flavor.
-
Protein-Packed Bites: Use this recipe to create mini cheesecakes in muffin tins for portioned delights—perfect for meal prep or on-the-go!
Chef’s Notes
Creating this Protein Italian Cannoli Cheesecake was like stepping into a time machine! As I mixed the ingredients, I could almost hear my grandma’s laughter and smell her sweet desserts filling the kitchen. The best part about this recipe? It’s not just a healthier alternative; it can adapt to whatever you have on hand or any dietary preference.
Also, remember that even the best chefs have off days. I once accidentally mixed salt instead of sugar into a dessert (oops!), which led to some hilariously confused faces during family dinner. Just keep it light-hearted in the kitchen; after all, the laughter is as memorable as the food!
FAQs and Troubleshooting
1. My cheesecake didn’t set properly! What happened?
Make sure you let it cool completely before refrigerating. If it’s underbaked, that could also cause issues. Trust your oven and keep an eye on it!
2. Can I use other sweeteners?
Absolutely! Feel free to use any liquid or granulated natural sweeteners that you prefer. Just note that the texture might slightly change.
3. What if I can’t find protein powder?
No problem! You can omit the protein powder entirely or replace it with a bit of ground nuts or coconut flour for that added texture.
4. Can I freeze leftover cheesecake?
Yes! To freeze, ensure it’s well-wrapped in plastic wrap and aluminum foil. Thaw it in the fridge before enjoying!
Nutritional Info
This Protein Italian Cannoli Cheesecake is more than just delicious; it’s also packed with beneficial nutrients! Using Greek yogurt boosts your protein intake, while opting for natural sweeteners allows you to indulge without the guilt. Plus, with the health-focused ingredients, you’ll find yourself feeling satisfied yet light!
- Calories: Estimated ~180 per slice (based on 12 slices)
- Protein: ~10g per slice
- Carbs: ~15g per slice
- Fats: ~8g per slice, depending on cream cheese type
So there you have it—a delightful Protein Italian Cannoli Cheesecake that’s not only easy to make but also brings you the best of both worlds. Whether you’re craving a taste of childhood or looking to impress friends at a gathering, this recipe has you covered!
Now go grab those ingredients, get your kitchen ready for some crunchy magic, and let’s make dessert exciting again! Cheers to deliciousness! 🥳✨
Until next time, keep it crunchy!
— Camille 🥬🥑✨