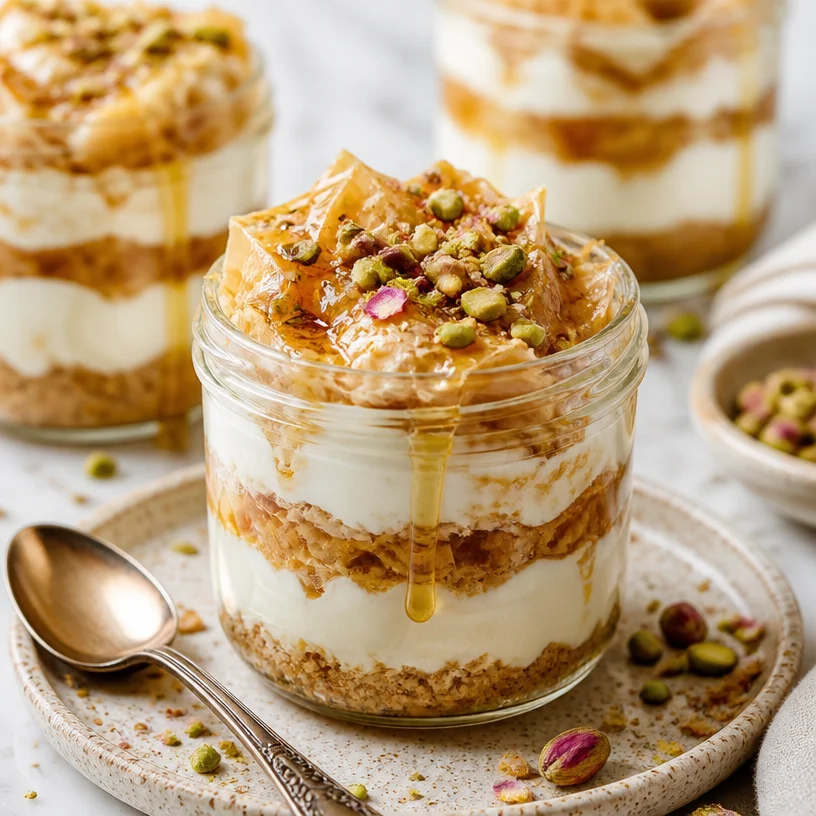
Discovering the Magic of Protein Baklava Cheesecake Jars
Hey there, crunchy food lovers! It’s Camille here, and today I’m stoked to share one of my absolute favorite recipes: Protein Baklava Cheesecake Jars. If you’re looking for a sweet treat that combines the rich flavors of baklava with the creamy delight of cheesecake—while packing in some protein—then you’ve hit the jackpot! 🎉
I vividly remember my first encounter with baklava. I was a kid visiting a local Mediterranean café, surrounded by tantalizing aromas of spices and honey. The first bite of that flaky, nutty goodness took me on an instant flavor adventure! Fast forward to today, my love for desserts knows no bounds, and I thought, why not bring this nostalgia into a healthier, protein-packed format? So, after some fun experimentation in the kitchen, voilà—Protein Baklava Cheesecake Jars were born!
Let’s Gather Our Ingredients
Before we dive into the kitchen, let’s take a moment to assemble our star players for this recipe:
-
Greek Yogurt or Cottage Cheese:
This brings a creamy texture and a nice protein boost. If you’re vegan, you could opt for a plant-based yogurt or a silken tofu for a similar consistency. -
Protein Powder:
Choose your favorite flavor—vanilla or honey works beautifully. If you’re not into protein powders, you can skip it, but it does add a nice protein punch! -
Light Cream Cheese:
This adds the rich, cheesecake flavor without all the calories. If you want it lighter, you could use Neufchâtel cheese, or for a dairy-free option, some almond-based cream cheese would do the trick! -
Premium Flavor Ingredients:
This includes honey, cinnamon, and crushed nuts. Each element enhances the layers of flavor—definitely don’t skip them! -
Natural Sweetener:
Maple syrup, agave nectar, or even stevia work wonders here. Adjust to your taste!
Ingredient Insights
These ingredients not only create a great texture but also offer wholesome goodness. Feel free to mix and match based on what you have or your dietary preferences.
Step-by-Step Instructions
Now that we have everything ready, let’s get our hands buttery and dive into some deliciousness!
Step 1: Prepare Your Nutty Base
- Crush Your Nuts: In a food processor, pulse 1 cup of your choice of nuts (I love walnuts and pistachios for that baklava flavor) until they’re finely chopped but not dust.
- Chef Tip: You can toast them lightly in a skillet for extra flavor. Just keep an eye on them; they can go from perfectly toasted to burnt pretty quickly!
Step 2: Mix the Cheesecake Filling
-
Combine the Creamy Elements: In a mixing bowl, combine 1 cup Greek yogurt (or cottage cheese), 1/2 cup light cream cheese, and 1 scoop of protein powder.
- Commentary: Use a hand mixer for a smooth consistency—it’s like whipping up a cloud of deliciousness!
-
Sweeten Your Mixture: Add in 2 tablespoons of honey (or your chosen sweetener) and a pinch of cinnamon to the wet ingredients. Mix until well-blended.
- Chef Hack: Taste as you go! You want it sweet enough to cut through the nuttiness but not overpowering.
Step 3: Layering Magic
- Start Layering: In a glass jar (or a bowl if you’re feeling rustic), add a spoonful of the nut mix, then add a layer of the cheesecake filling. Repeat the layers until you reach the top of the jar.
- Pro Tip: Save some crushed nuts for the top; they’ll add that perfect finishing crunch!
Step 4: Chill and Set
- Refrigerate: Cover the jars and let them chill for at least 2 hours (or overnight). This allows the flavors to really settle in and marry beautifully.
- Fun Story: One of the first times I made these, I got impatient and tested them after just an hour. Let’s just say the flavors were great, but the texture was quite different!
Serving Suggestions
When you’re ready to indulge, simply pull your jars out of the fridge. You can add a drizzle of honey or maple syrup on top for an extra touch of sweetness, and don’t forget a sprinkle of chopped nuts for that irresistible crunch. Serve with a side of fresh strawberries or blueberries to brighten it up even more!
Recipe Variations
Now, let’s mix things up! Here are some delightful twists you can try with these jars:
- Chocolate Lovers: Add cocoa powder to the cheesecake mixture and top with chocolate shavings.
- Baklava Bliss: Layer in some dates or dried figs alongside the nut mix for added sweetness and texture.
- Citrus Zing: Grate a little orange or lemon zest into the cheesecake filling for a refreshing citrus note.
- Nut-Free Version: Substitute the nuts with crushed graham crackers or granola for that crunch, perfect if you’re avoiding nuts.
- Vegan Adaptation: Use a plant-based yogurt, a dairy-free cream cheese, and a plant protein powder for a completely vegan version!
Chef’s Notes
These Protein Baklava Cheesecake Jars have become a staple in my fridge. They’re the perfect pick-me-up after a workout or a special treat after dinner. I love how versatile the recipe is—you can really play around with the flavors based on what you have at home.
And remember, the best part about any recipe is making it your own. So get creative, tell your own kitchen stories, and make sure you share your versions with me—I love seeing how you guys make things crunchy!
FAQs and Troubleshooting
-
Can I use regular cream cheese?
Absolutely! Just keep the portions the same, but it will be richer in flavor. -
How can I make these jars lower in sugar?
Swap the honey for a non-caloric sweetener like stevia or monk fruit—just adjust according to your taste. -
What can I do if it’s too sweet?
You can balance it by mixing in a little plain Greek yogurt or cottage cheese to even things out. -
How long do these last in the fridge?
They should be good for up to a week in the fridge, but why wait that long to dig in?!
Nutritional Info
While exact values can vary based on the specific ingredients you use, each serving is packed with protein, healthy fats, and essential nutrients, making it a satisfying dessert or snack without the guilt!
Final Thoughts
There you have it, my vibrant, crunchy foodies! Protein Baklava Cheesecake Jars are not just a treat; they’re an experience—a way to celebrate flavors you love in a healthier form. So grab your ingredients, channel your inner chef, and let’s make some magic happen in the kitchen. I can’t wait to hear how yours turn out!
Let’s keep crunching and creating together! Until next time, keep it colorful and delicious! 🥗🌟
— Camille 🥬🥑✨