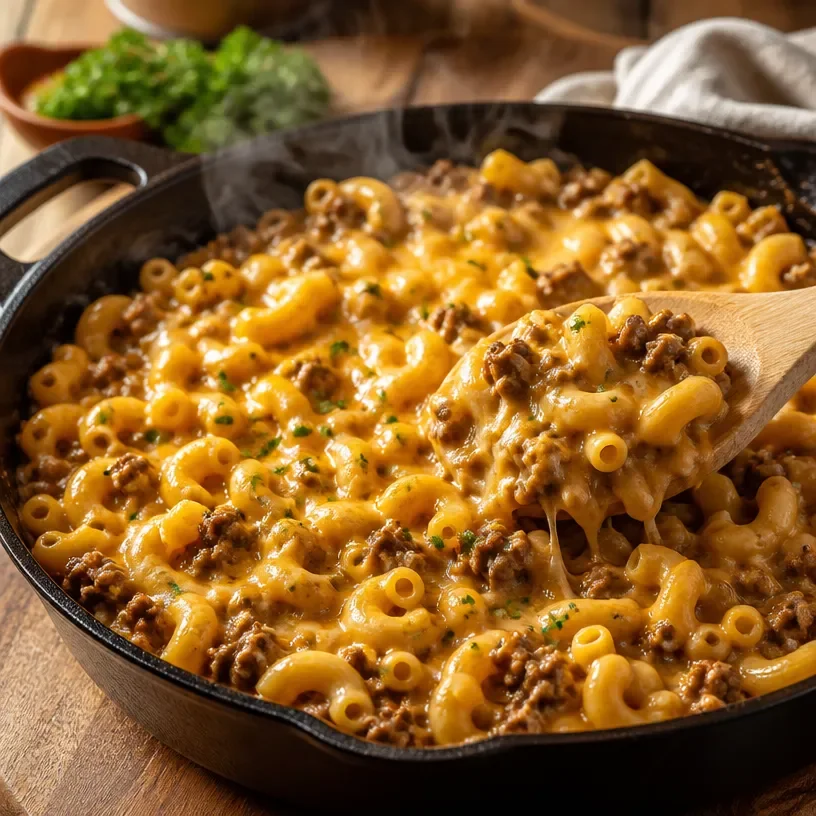
The Cheesy Comfort of a Cheeseburger Skillet
Hey there, foodie friends! Welcome to my kitchen, where we’re about to embark on a delicious journey into the world of comforting meals. Today, I’m thrilled to share one of my fave go-to recipes that combines two of life’s greatest pleasures: cheeseburgers and mac and cheese. Yes, you heard me right! We’re diving into a mouthwatering Cheeseburger Skillet that’s quick, easy, and totally delightful.
Now, I know what you might be thinking—skillet meals are often a last-minute decision or something you whip up on a busy weeknight. But trust me, this dish deserves a place on your dinner table anytime you crave some nostalgic joy. Let’s scroll through this delicious recipe together!
A Trip Down Memory Lane
Growing up, my family would gather around the dining table on Friday nights for our weekly “cheeseburger night.” My dad would grill juicy patties in the backyard while we’d shake up our favorite toppings and sides. You could find everything from classic American cheese to wild toppings that we just couldn’t resist.
Fast forward a few years, and I realized I wanted to create a dish that combined all that cheeseburger magic without the fuss of a grill or a messy kitchen. Enter: the Cheeseburger Skillet! This dish is like a warm hug on your plate—a reminder of those carefree days filled with family, laughter, and, of course, delicious food. It’s quick to prepare, hearty, and every bite is a flavor explosion. Let’s dive into the ingredients and get cookin’.
Ingredients
Here’s what you’ll need to create your very own Cheeseburger Skillet. Each ingredient plays a key role, so let’s not skip over them!
-
2 lbs lean ground beef
This is the star of the show! Lean ground beef adds great flavor without too much grease. You can substitute it with turkey or plant-based ground meat for a lighter or vegetarian option. -
12 oz elbow macaroni
The quintessential mac shape. You could swap it for pretty much any pasta shape you love—shells, rotini, or even gluten-free pasta will work just fine. -
2 cups beef broth
This is where the depth of flavor comes from! You can use low-sodium broth to control the saltiness, or opt for vegetable broth for a lighter flavor. -
1 cup milk
Milk adds creaminess that ties everything together. Substitute it with non-dairy milk like almond or oat milk if you need a lactose-free option. -
2 cups cheddar cheese
Because who doesn’t love cheese? Cheddar gives that classic cheeseburger feel, but feel free to experiment with mozzarella or pepper jack for some kick. -
2 tbsp ketchup
A nod to the classic burger condiment! You can try BBQ sauce, sriracha, or even mustard if you’re feeling adventurous. -
1 tsp mustard
This adds a tangy flavor that complements the beef. You can use yellow, Dijon, or whole grain mustard—whatever you have on hand!
Step-by-Step Instructions
Ready to bring this Cheeseburger Skillet to life? Here we go!
Step 1: Sauté the Meat
Start by heating a large skillet over medium heat. Add the 2 lbs lean ground beef to the skillet. Break it up with a wooden spoon and cook until browned (about 5-7 minutes).
Chef Tip: Don’t skip the seasoning here! Toss in some salt and pepper while it’s cooking for extra flavor.
Step 2: Cook the Pasta
While the beef cooks, make sure you’re boiling some water in a separate pot. Add the 12 oz elbow macaroni and cook according to package instructions until al dente. Drain and set aside.
Chef Hack: You can cook the pasta right in the beef broth later on if you want to soak up even more flavor!
Step 3: Combine Ingredients
Once the beef is cooked through, drain any excess fat if necessary (gotta keep it lean!). Then, add 2 cups beef broth and 1 cup milk to the skillet. Bring the mixture to a simmer over medium heat, stirring occasionally.
Fun Fact: The broth and milk create a nice creamy sauce that will envelop the pasta beautifully!
Step 4: Mix in the Pasta and Cheese
Next, stir in the cooked pasta. Then add 2 cups cheddar cheese, 2 tbsp ketchup, and 1 tsp mustard to the skillet. Stir everything together until the cheese is melted and creamy.
Chef Insight: The mixture might seem a bit soupy at first, but fear not! The pasta will absorb the liquid as it sits.
Step 5: Taste and Adjust
Now is the time to taste your creation! You can add more salt, pepper, or even a dash of hot sauce if you want a kick. Just mix it all together, and your delicious Cheeseburger Skillet is ready to be served!
Chef Note: Don’t forget to let it rest for a couple of minutes before serving. It allows the flavors to marry perfectly.
Serving Suggestions
When it comes to serving this dish, keep it simple! I recommend plating it family-style straight from the skillet so everyone can dig in. Garnish with some chopped parsley or green onions for a pop of color. A sprinkle of extra cheese on top never hurt anyone either!
Pair it with a refreshing simple side salad or some crispy, buttery garlic bread for a wonderful meal.
Recipe Variations
Looking to switch things up? Here are a few fun variations you can try:
-
Bacon Cheeseburger: Add cooked, crumbled bacon to the beef for that smoky flavor we all love.
-
Veggie Twist: Toss in some diced bell peppers or mushrooms when you sauté the beef to introduce some veggies.
-
Spice it Up: Add jalapeños or spicy pepper jack cheese to give your skillet a kick!
-
Sour Cream Delight: Stir in a dollop of sour cream at the end for an extra creamy texture—yum!
-
Italian-Inspired: Add Italian seasoning and swap out cheddar for mozzarella, and voilà, you’ve got an Italian cheeseburger skillet!
Chef’s Notes
This recipe has been in my repertoire for years, and I can honestly say it’s evolved quite a bit! At first, the idea was simple: combine burger flavors into a skillet. But as I played around in the kitchen, I realized all the little tweaks you can make. It’s incredible how one dish can transform and accommodate different tastes and dietary needs. Plus, if you have kids, they’re gonna absolutely love this!
Funny Kitchen Story: One time I attempted to add a splash of white wine for sophistication! Let’s just say my dog ended up with a very confused look on his face as I desperately tried to salvage my dish. Now I just stick to what I know works!
FAQs and Troubleshooting
Q1: My dish is too watery! What did I do wrong?
Don’t worry! This can happen if you added too much liquid or didn’t let it reduce long enough. Just let it simmer longer, and it should thicken up perfectly.
Q2: Can I make this ahead?
Absolutely! This dish stores wonderfully in the fridge for up to 3 days. Just reheat it on the stovetop, adding a splash of milk to keep it creamy.
Q3: What if I don’t have beef broth?
No beef broth? No problem! Chicken broth or even vegetable broth will work just fine. You’ll still get a delicious dish without missing a beat.
Q4: Can I freeze the leftovers?
Yes, you can freeze the leftovers! Just let it cool completely, transfer it to an airtight container, and it will keep for about 3 months. Thaw overnight in the fridge before reheating.
Nutritional Info
While I’m all about enjoying good food without worrying too much about numbers, here’s a quick rundown on the approximate nutritional values for a serving:
- Calories: 450
- Protein: 28g
- Carbs: 30g
- Fat: 22g
Remember, it’s always best to calculate based on the specific ingredients and portion sizes you use!
There you have it! Your very own Cheeseburger Skillet that’s sure to bring a smile to your face and warmth to your evenings. I hope you enjoy making this just as much as I do. Let’s scroll less, cook more, and create more delicious memories together! Happy cooking!
— Lila 🍓📱✨