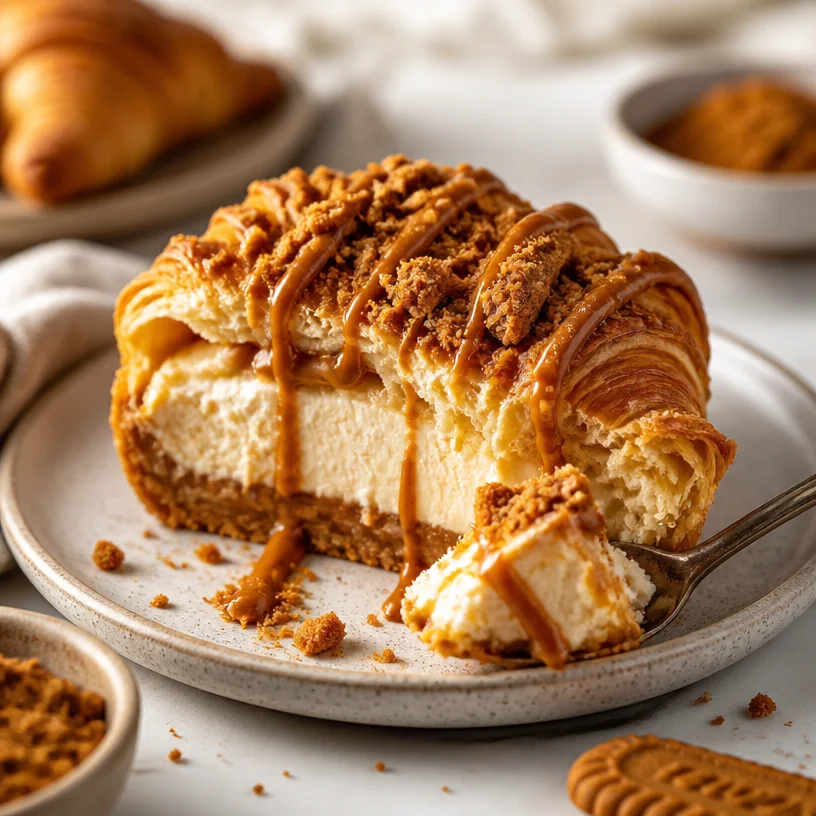
Indulge in a Crunchy Dream: Protein Biscoff Croissant Cheesecake Recipe
Hello, my fellow food lovers! 🌟 If you’re on the hunt for something that tantalizes your taste buds and gives you that dreamy crunch, you’ve landed in the right spot. Today, we’re diving into a divine creation that marries the richness of cheesecake with the delightful flavor of Biscoff, all nestled in a comforting croissant. Trust me, you won’t want to miss out on this Protein Biscoff Croissant Cheesecake!
A Sweet Memory: The Birth of My Biscoff Fantasy
Let me take you back to a sunny afternoon when I first discovered Biscoff cookies. Picture this: I was sitting in a quaint coffee shop, indulging in a buttery croissant paired with a cup of steaming chai latte. As I sipped, I noticed a delicate jar filled with those iconic caramelized cookies at the counter. Intrigued, I gave it a try, and oh boy, it was love at first bite!
The caramel flavor mingled with a slight spice — pure bliss. From that moment, I vowed to create something special that incorporated these delightful cookies. I wanted to combine my love for cheesecake with the lightness of a croissant, all while keeping it protein-packed for that extra boost. Thus, the Protein Biscoff Croissant Cheesecake was born!
Let’s get to work and create this masterpiece together!
Gathering the Goodies: Ingredients for Success
Before we jump into the mixing and baking, let’s gather the ingredients that will transform our kitchen into a cozy cheesecake haven:
-
1 cup Greek yogurt or cottage cheese
- A great source of protein and creaminess. If you want a richer flavor, opt for full-fat Greek yogurt!
-
1 scoop vanilla or Biscoff-flavored protein powder
- This adds protein without overwhelming the flavor. Use your favorite protein blend, or if you’re feeling adventurous, try a plant-based version!
-
8 oz light cream cheese
- Creamy and smooth, it’s essential for texture. If you’re gauging fat content, try making your cheesecake with Neufchâtel cheese!
-
4–6 Biscoff cookies, crushed
- These crunchy delights are the star flavor here! For a gluten-free version, consider using gluten-free cookies.
-
2 tbsp natural sweetener (e.g., honey, maple syrup, or agave)
- This will amplify the sweetness without adding too many calories. Feel free to adjust according to your taste.
-
A pinch of sea salt
- This little ingredient brings all the flavors to life!
-
1–2 additional Biscoff cookies for garnishing
- Because who doesn’t want that extra crunch on top?
Step-by-Step Instructions: Let’s Bake!
Step 1: Preheat and Prep
Start by preheating your oven to 350°F (175°C). Line a small springform pan with parchment paper. This will make your life easier when it’s time to pop the cheesecake out!
Step 2: Blend the Base
In a large mixing bowl, combine the Greek yogurt (or cottage cheese) and light cream cheese. Mix until it’s smooth and creamy. Tip: For best results, let the cream cheese soften at room temperature before mixing; this prevents lumps!
Step 3: Add the Sweetness
Sprinkle in the sweetener and a pinch of sea salt. Blend well. Chef Hack: Taste as you go! If you prefer a sweeter dessert, adjust the sweetener to suit your taste buds.
Step 4: Protein Power
Add your protein powder and mix until fully incorporated. You want a consistent texture, so whisk it in well.
Step 5: Cookie Crush
Now for the fun part! Take 4–6 Biscoff cookies and crush them into fine crumbs. You can do this in a food processor or by placing them in a zip-lock bag and smashing them with a rolling pin — perfect for those stress-relieving moments! Fold the crumbs into your batter gently.
Step 6: Fill the Pan
Pour the cheesecake mix into the prepared springform pan and level the top with a spatula (because we want this to look as good as it tastes!).
Step 7: Bake
Place your masterpiece in the preheated oven and bake for about 25-30 minutes, or until the edges are set and the center is slightly jiggly. Once done, turn off the oven and let it cool inside for about 10 minutes. Pro Tip: This gentle cooling helps prevent cracks!
Step 8: Chill Out
After cooling in the oven, let the cheesecake reach room temperature, then cover and chill in the fridge for at least 4 hours (or overnight if you can wait!). Trust me, patience is key here!
Step 9: Serve with Style
When you’re ready to serve, carefully release the cheesecake from the springform pan. Crumble extra Biscoff cookies on top for that irresistible crunch! Slice it up, plate it beautifully, and get ready for the compliments to roll in.
Serving Suggestions: Make It a Feast
Plate your Protein Biscoff Croissant Cheesecake with a delightful dollop of Greek yogurt on the side, garnished with fresh berries and a sprig of mint. This not only adds a pop of color but also brings in a refreshing contrast to the creamy richness of the cheesecake. Pair it with a bold coffee or a fruity herbal tea — your taste buds will be dancing!
Recipe Variations: Spice It Up!
Now, let’s shake things up a bit. Here are a few creative twists to try:
-
Chocolate Lovers Delight: Add cocoa powder to the cheesecake mix for a chocolate twist. You can even swirl in some melted dark chocolate for that gooey indulgence!
-
Nutty Biscoff: Incorporate crushed nuts (like almonds or pecans) into the cheesecake for added texture and flavor.
-
Fruit Fusion: Swirl in some pureed berries (like strawberries or raspberries) for a fruity burst. It’ll add a beautiful marbled look!
-
Vegan Version: Swap the cream cheese for vegan cream cheese and use plant-based protein powder alongside coconut yogurt.
-
Spicy Biscoff: A pinch of cinnamon or nutmeg can elevate the cookie flavor to new heights — give it a cozy autumn twist!
Chef’s Notes: My Culinary Journey
As I’ve evolved as a home chef, my quest has always been about joyfully experimenting with flavors. My Protein Biscoff Croissant Cheesecake didn’t start as the powerhouse it is now. It began as simple layers of flavors, which I played with over time — one delicious mistake led to another scrumptious triumph!
I’ve learned so much about balancing flavors and textures through the years, embracing the crispy, crunchy notes we all crave. And you know what? There are still days when I forget an ingredient or miscalculate baking time! It’s all part of the journey of a passionate foodie, and honestly, I wouldn’t change a thing.
FAQs and Troubleshooting: Your Questions Answered
1. My cheesecake cracked. What did I do wrong?
Don’t worry, it happens to the best of us! Cracking usually happens if the cheesecake is baked too long or if it cools too quickly. Keep it cozy in the oven and avoid opening the door repeatedly during baking.
2. Can I freeze this cheesecake?
Absolutely! Once fully chilled, wrap it tightly in plastic wrap and foil. It can last about 1-2 months in the freezer. Just make sure to leave it in the fridge overnight to thaw when you’re ready to enjoy it again!
3. How can I make this lower in calories?
Using fat-free Greek yogurt, light cream cheese, and a sugar substitute can significantly reduce the calorie count while still delivering on flavor.
4. Can I make this without protein powder?
Yes! You can increase the amount of Greek yogurt or cottage cheese to compensate for the missing protein powder, just remember to balance the sweetness accordingly.
A Nutritional Boost: What’s In Your Slice?
Per serving (based on 8 slices):
- Calories: ~180
- Protein: ~12g
- Fat: ~8g
- Carbohydrates: ~18g
- Fiber: ~1g
(Note: These values may vary based on ingredients used)
And there you have it, my crunchy culinary companions! Your Protein Biscoff Croissant Cheesecake is ready to shine at your next gathering or to be savored in solitude (no judgment here!). So roll up your sleeves, grab your ingredients, and let’s create something scrumptious together. I can’t wait to hear how yours turns out! Until next time, happy cooking! 🍽️✨
— Camille 🥬🥑✨