
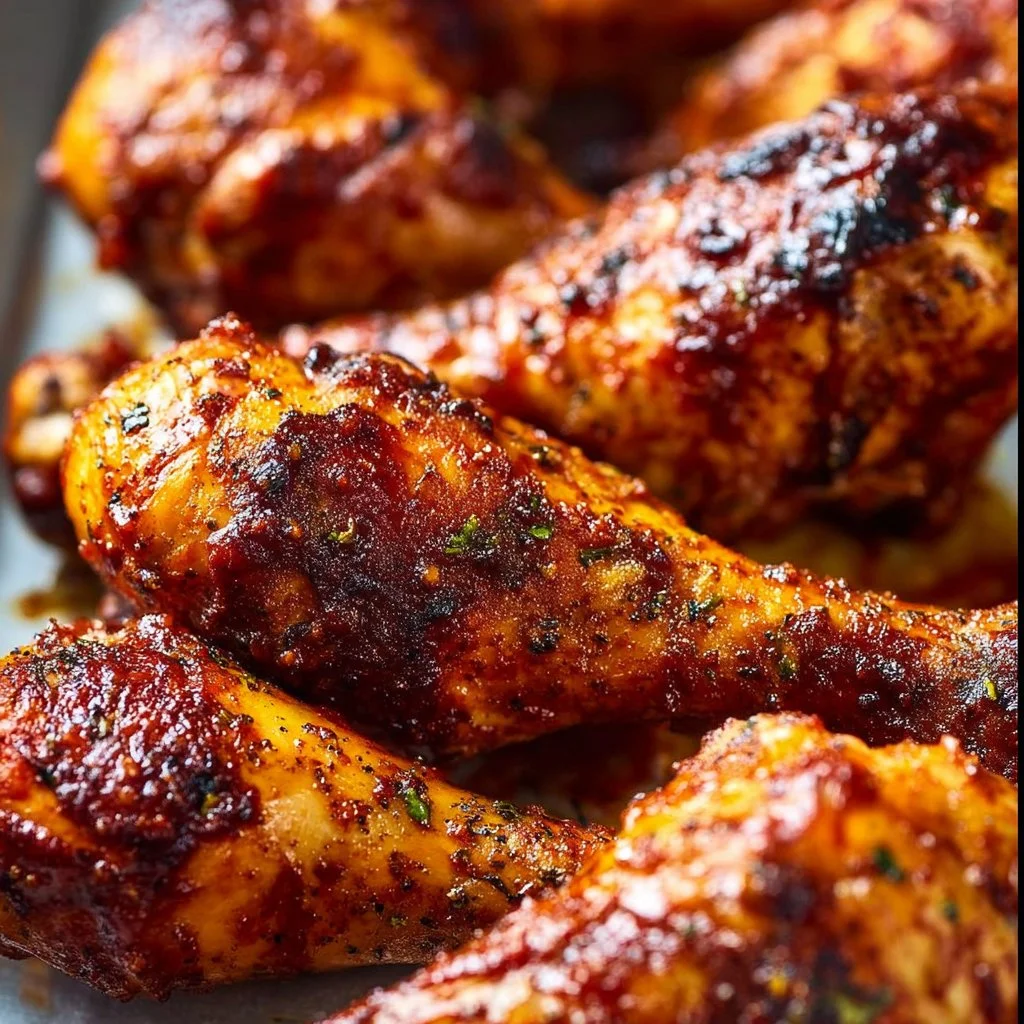
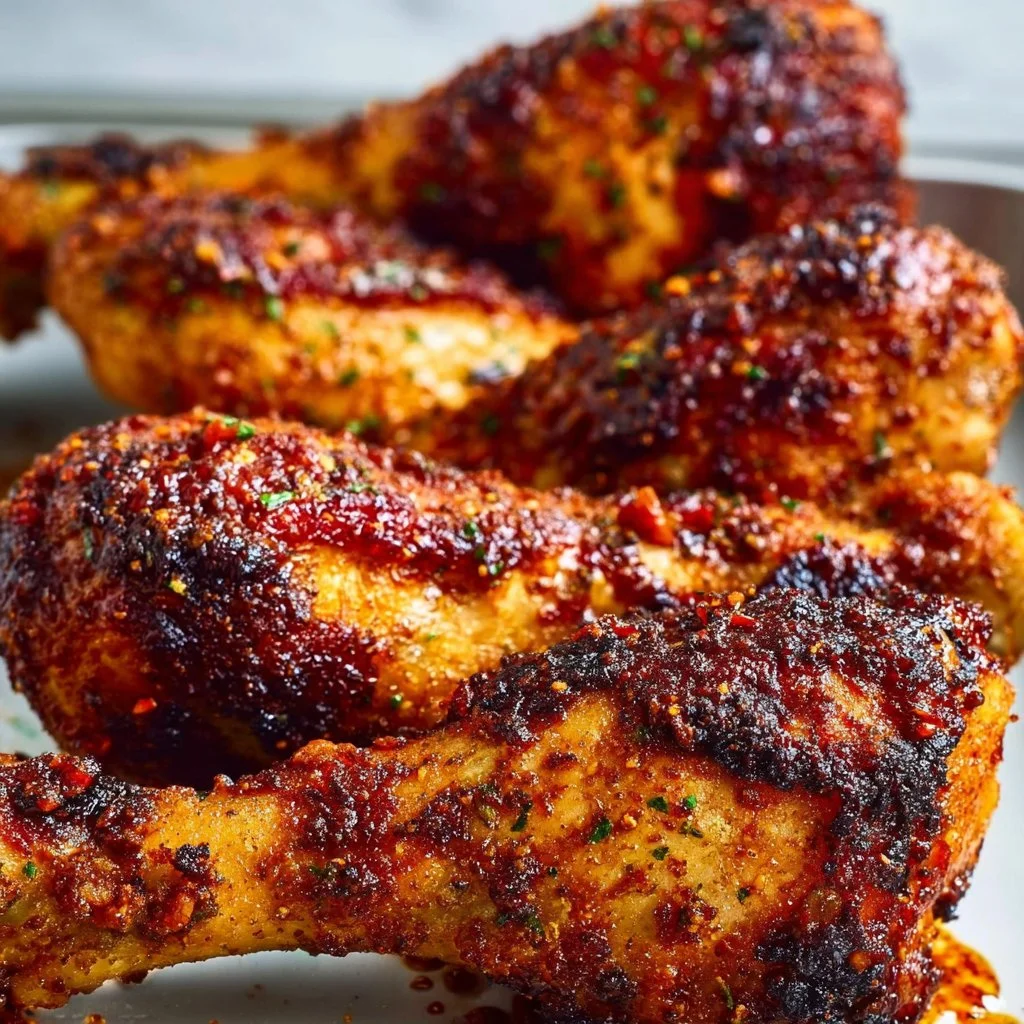
Crispy Baked BBQ Chicken Drumsticks: Easy Yumminess for Your Table
Hey foodies! 🍴✨ If there’s one dish that screams summer cookouts and cozy family dinners, it’s crispy baked BBQ chicken drumsticks. From the first bite to the last lick of fingers, these little flavor bombs deliver pure joy—and they’re super easy to make! Join me on this culinary journey as we dive into a tasty recipe that’s simple enough even for the busiest days.
The Joy of Drumsticks
Let me take you back for a moment. Picture this: it’s a sunny afternoon, and the scent of smoky BBQ fills the air as my family gathers around the grilling station in our backyard. Big laughter, kids playing catch, and my dad flipping chicken on a hot grill—that’s the essence of my childhood summers. One of my favorite memories is the aroma of sweet BBQ sauce mingling with the crisp air as we devoured plate after plate of drumsticks. Those moments weren’t just about the food; they were creations of love, laughter, and togetherness.
Fast forward to today, and while we all might not have a grill handy every day (or the time to use one), I still wanted to capture that feeling. That’s why I became obsessed with making Crispy Baked BBQ Chicken Drumsticks right in my kitchen. Bake them, toss them in BBQ sauce, and voila—gorgeous, crispy, sticky goodness reminiscent of those golden moments. Let’s get you cooking!
Ingredients
Here’s what you’ll need to get these mouth-watering drumsticks on your table:
-
8 chicken drumsticks
Juicy and tender, drumsticks are perfect for oven baking. You can substitute them with thighs if you prefer dark meat, or even chicken wings for a snackable option! -
1 cup BBQ sauce
Go for your favorite BBQ sauce—whether it’s sweet, tangy, or smoky. If you’re feeling adventurous, try making your own at home or substitute with a sticker-friendly option like hot sauce mixed with honey. -
1 tablespoon olive oil
This is our secret to achieving a crispy texture. Canola oil or avocado oil also works. Just make sure you use something that can handle the heat! -
1 teaspoon garlic powder
Garlic powder gives that wonderful depth of flavor without the hassle of peeling and chopping fresh garlic. You can always switch this for fresh garlic minced, but just remember to adjust the quantity. -
1 teaspoon onion powder
A bare minimum for enhancing flavor. If you’re out, some grated onion or shallots can also stand in nicely—just use less since it’s stronger! -
1 teaspoon salt
Essential for amplifying flavor, but feel free to adjust based on dietary needs. For a twist, use smoked salt for a subtle BBQ vibe. -
1/2 teaspoon black pepper
A little heat and depth—black pepper elevates every dish! White pepper can be a great substitute, too, if you want a less noticeable color. -
1/2 teaspoon paprika
Paprika not only gives a lovely color, but it adds a subtle sweetness and smokiness. You could use smoked paprika for an extra punch!
Step-by-Step Instructions
Ready to let the aroma of BBQ fill your kitchen? Let’s get cooking!
Step 1: Preheat the Oven
First things first—preheat your oven to 425°F (220°C). This high temperature is what helps get that delicious, crispy skin we’re after.
Step 2: Prepare the Drumsticks
Go ahead and pat the chicken drumsticks dry with a paper towel. This helps the skin crisp up when baking. Once they’re patted dry, place them in a large bowl.
Tip: Don’t skip this step! Moisture is a drumstick’s enemy when it comes to crispiness!
Step 3: Coat and Season
Drizzle the olive oil over the drumsticks and sprinkle in the garlic powder, onion powder, salt, black pepper, and paprika. Toss it all together until the drumsticks are well coated.
Chef Hack: This can get a bit messy, so gloves can help with tossing! Plus, less scrubbing later—win-win!
Step 4: Bake the Drumsticks
Line a baking sheet with parchment paper or a silicone baking mat for easy cleanup. Place the seasoned drumsticks on the sheet with some space in between each to allow even cooking. Bake for 30-35 minutes or until the skin looks golden and crispy, and the meat is cooked through.
Tip: Use a meat thermometer! You want the internal temperature to reach at least 165°F (75°C).
Step 5: BBQ Sauce Time
Once those lovely drumsticks are done, pull them out of the oven. Brush them generously with your BBQ sauce—don’t hold back, get that flavor in there! Pop them back in the oven for an additional 10-15 minutes until the sauce is bubbly and caramelized.
Chef’s Tip: For an even better crust, broil them for the last 2 minutes. Just keep an eye on them—things can go from perfect to burnt real quick!
Step 6: Serve and Enjoy
Let the drumsticks rest for about 5 minutes before serving. This allows the juices to redistribute, making each bite delectable and tender.
Serving Suggestions
Want your drumsticks to steal the show? Here’s how to plate them:
- Place a few drumsticks on a colorful platter and drizzle some extra BBQ sauce over the top.
- Add a side of crispy coleslaw for crunch and freshness.
- If you’re feeling fancy, sprinkle chopped fresh herbs like parsley or cilantro for a pop of color!
These look stunning and are guaranteed to impress your guests.
Recipe Variations
Want to get creative? Here are some scrumptious variations to consider:
-
Spicy BBQ Chicken: Add some cayenne pepper or hot sauce to the seasoning mix for a spicy kick!
-
Asian-Inspired Glaze: Use teriyaki sauce instead of BBQ and sprinkle sesame seeds and green onions before serving.
-
Honey Mustard Drumsticks: Swap BBQ sauce with a homemade honey-mustard mix (equal parts honey and mustard) for a zesty flair.
-
Herbed Lemon Drumsticks: Use lemon zest and Italian herbs like thyme and rosemary along with the olive oil for a Mediterranean twist.
-
Smoky Chipotle: Add chipotle powder to the seasoning and mix smoked paprika with your BBQ sauce for an extra layer of flavor!
Chef’s Notes
Now, a little secret—don’t be afraid to adjust the flavors based on what you love. Cooking is all about experimenting, and that’s where you discover what truly tickles your tastebuds. I’ve even had nights where I’ve completely switched up the spices based on what I had left in my pantry, and you know what? Some of those "oops" moments became new family favorites!
Last year, I decided to throw a BBQ party with these drumsticks as the star attraction. By the end of the night, I had friends reaching for those drumsticks off the platter, and let’s just say they definitely didn’t make it to leftovers!
FAQs and Troubleshooting
Got questions? I’ve got you covered! Here are some common queries and solutions:
1. Why aren’t my drumsticks crispy?
Ensure to dry your chicken thoroughly before seasoning and use a high rack in the oven to maximize air circulation.
2. Can I use frozen drumsticks?
Definitely! Just ensure they’re fully thawed before cooking. You might need to increase the cooking time, so always check with a meat thermometer.
3. What if I don’t have BBQ sauce?
No problem! You can make a simple marinade with soy sauce, honey, garlic, and a bit of mustard. It’s a great alternative!
4. Can I make these in the air fryer?
Yep! Cook at 400°F (200°C) for 25 minutes, flipping halfway through for that signature crisp. Finish off with BBQ sauce in the last few minutes, just like in the oven.
Nutritional Info (Optional)
While I don’t like to obsess over numbers too much—food is about enjoyment—you might be wondering about the nutritional breakdown. Here’s a rough estimation per serving (based on one drumstick with BBQ sauce):
- Calories: ~210
- Protein: ~19g
- Fat: ~14g
- Carbohydrates: ~8g
- Fiber: 0g
Remember, this can vary based on your exact ingredients and portion sizes!
And there you have it, my fellow foodies! These Crispy Baked BBQ Chicken Drumsticks are not only a cinch to make but also a delightful way to bring back those nostalgic family memories. I hope you try them out and create your own kitchen stories. Let’s scroll less, cook more, and savor every bite together! Happy cooking! 🍗❤️