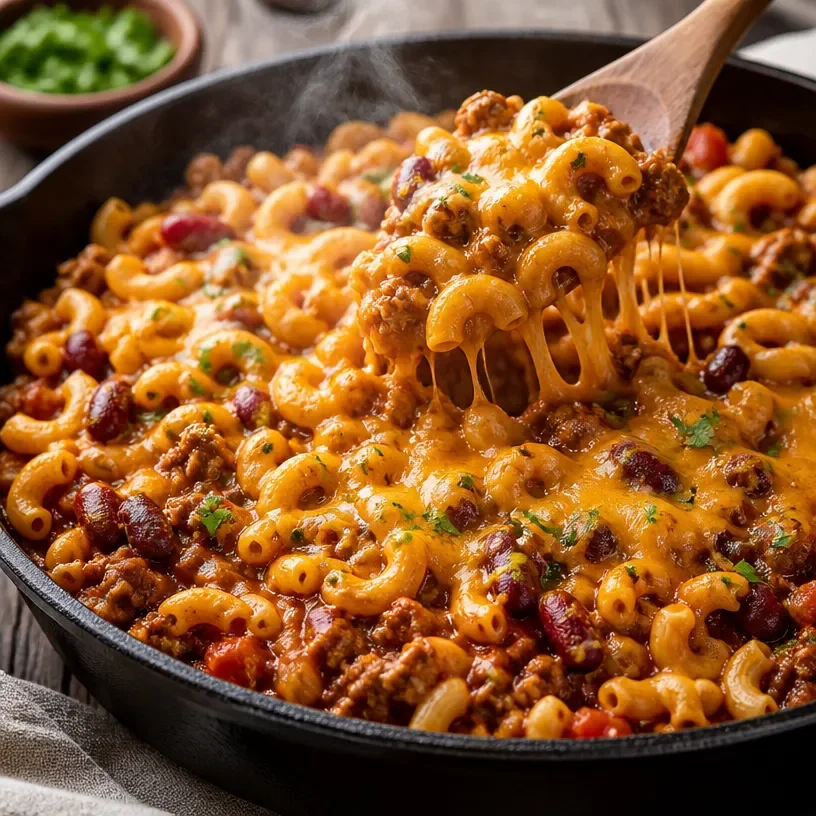
Ultimate Beef Chili Mac Skillet: Your New Weeknight Hero!
Hey food lovers! I’m so excited to share one of my all-time favorite dishes with you today — the Ultimate Beef Chili Mac Skillet! This dish is not just delicious; it’s also a cozy hug in a bowl, perfect for those nights when you need comfort food but don’t want to spend hours in the kitchen. Grab your apron, and let’s dive in!
A Bit of Kitchen Nostalgia
You know that nostalgia hits hard, especially when it comes to food. I still remember the first time I made a cheesy chili mac for my family. I was about twelve, and my mom had given me the reins of the kitchen for the very first time. I was beyond excited! I threw together some pasta and whatever I could find in the pantry, and while the measurements were off and the flavors weren’t quite right, my family devoured it anyway. They said it was the best thing they’d ever had — probably just to encourage my budding chef dreams!
Fast forward to today, and I’ve perfected the art of Beef Chili Mac Skillet. It’s the perfect blend of hearty beef, flavorful chili, creamy cheese, and, of course, macaroni — all made in one skillet! Trust me, once you give this recipe a try, you’ll want to keep it in your weeknight rotation.
Ingredients You’ll Need
Here’s what you’ll need to whip up this comforting skillet dish. Don’t worry, I’ve thrown in some notes and substitution ideas for each ingredient along the way!
-
2 lbs lean ground beef
Lean ground beef gives a rich flavor without being too greasy. If you want a leaner option, try ground turkey or use plant-based ground meat for a vegetarian twist. -
12 oz elbow macaroni
Classic choice! If you’re feeling adventurous, swap with cavatappi or even gluten-free pasta. Just make sure to adjust the cooking time as needed. -
2 cups beef broth
Beef broth adds depth to the dish. Feel free to use chicken broth or vegetable broth as a substitute. You can also use homemade broth for an extra flavor boost! -
1 can diced tomatoes (14.5 oz)
These add a lovely acidity and sweetness. If you prefer a little more heat, choose fire-roasted diced tomatoes instead! -
2 tbsp chili powder
This is where the magic happens! Chili powder is a blend of spices, but you can customize it with smoked paprika for a smoky touch or cayenne if you like a kick! -
1 cup kidney beans (canned)
Beans add protein and fiber. If kidney beans aren’t your jam, black beans or pinto beans will work just fine. -
2 cups cheddar cheese (shredded)
Cheddar melts beautifully and gives that gooey factor. Use Monterey Jack or pepper jack for a different flavor profile.
Step-by-Step Instructions
Now that we’ve got all our ingredients ready, it’s time to cook! Follow these steps for a smooth and delicious dish.
-
Brown the Beef
In a large skillet, cook 2 lbs of lean ground beef over medium heat until browned, breaking it apart as it cooks. This usually takes about 5-7 minutes. Drain any excess grease — you want flavor, not a pool of oil!
Pro Tip: Season the beef with a pinch of salt and pepper while it’s cooking. It enhances the flavor right from the start! -
Add the Onions
If you’re feeling fancy, throw in a diced onion during the browning process! It adds aromatics and sweetness. Cook until the onion is translucent, about 2-3 minutes.
Chef’s Insight: If you want to hide some veggies, finely dice carrots or bell peppers and toss them in too! -
Incorporate the Tomatoes and Broth
Stir in the can of diced tomatoes, 2 cups of beef broth, and 2 tbsp of chili powder. Bring the mixture to a gentle simmer.
Quick Tip: Let it simmer for about 5 minutes to meld those flavors; your kitchen will smell heavenly! -
Add the Macaroni
Now for the fun part! Pour in the 12 oz of elbow macaroni. Stir well to combine everything, ensuring the pasta is submerged in liquid.
Fun Hack: If your skillet is looking a bit dry, add a splash of water or more broth to keep it saucy! -
Cook the Pasta
Cover the skillet with a lid and let it all cook for about 10-12 minutes, stirring occasionally. You want to make sure the pasta is al dente and has absorbed some of that flavorful broth!
Tip: Check the pasta a minute or two earlier, as cooking times can vary based on the pasta type. -
Stir in the Beans
Once the macaroni is cooked to perfection, stir in your 1 cup of kidney beans and let them warm through for another 2-3 minutes.
Voice of Experience: Rinse your canned beans to remove excess sodium — it really makes a difference! -
Cheesy Goodness
Finally, sprinkle in those 2 cups of cheddar cheese and stir until melted and gooey. Feel free to reserve a little cheese for topping later!
Chef’s Note: For an extra cheesy bite, try using a blend of cheeses!
Serving Suggestions
Here’s where you can get creative! Serve your Beef Chili Mac Skillet right from the skillet for a casual vibe, or plate it up with a sprinkle of fresh herbs, like cilantro or parsley. A dollop of sour cream or Greek yogurt on top gives a nice tangy contrast.
For extra color and flavor, consider adding sliced avocados or pickled jalapeños to each bowl. And let’s be honest, nothing beats a side of cornbread or tortilla chips for that perfect crunch alongside!
Recipe Variations
Now that you’ve got the hang of the basic recipe, let’s mix things up a bit! Here are a few creative twists you can explore:
-
Spicy Southwest: Add canned chipotle peppers in adobo sauce for a smoky, spicy kick! Just chop them up and mix them in with the tomatoes.
-
Creamy Chili Mac: Stir in a cup of cream cheese or sour cream during the last few minutes of cooking for a creamy, velvety finish.
-
Veggie Love: Sneak in some chopped spinach, kale, or zucchini for a nutritional boost. Just add these in when you add the beans to soften them up.
-
BBQ Bliss: Replace the chili powder with your favorite BBQ seasoning and mix in some corn for a sweet twist!
-
Plant-Based Delight: Use lentils or your favorite plant-based minced meat for a hearty vegetarian version, and swap cheddar for a dairy-free cheese alternative.
Chef’s Notes
Over the years, I’ve developed this recipe based on feedback from friends and family. It’s been tweaked, taste-tested, and altered countless times, but it remains a family favorite. One time, I even entered a chili cook-off with this dish — let’s just say it didn’t win, but it sure made a lot of friends that day.
Cooking should be about experimentation! Don’t be afraid to adjust spices or ingredients based on your own preferences. Cooking is like a dance, and you should always feel free to add your own rhythm to the mix.
FAQs and Troubleshooting
1. Why is my chili mac too dry?
If your skillet looks dry, it may be that the pasta absorbed too much broth. Always add extra broth or water if it looks too thick while cooking!
2. Can I make this ahead of time?
Absolutely! This dish stores well in the fridge in an airtight container for up to 3 days. Just make sure to reheat with a splash of broth to loosen it up.
3. How do I prevent my pasta from being mushy?
Keep an eye on the cooking time! Remember that pasta continues to cook even after you take it off the heat. Try tasting it a minute or two before the suggested cooking time.
4. Can I freeze chili mac?
Yes, you can! Allow it to cool completely, then transfer it to an airtight container. It can be frozen for up to 3 months. When you’re ready to enjoy it, thaw in the fridge overnight and reheat on the stove.
Nutritional Info
While I don’t focus heavily on the numbers, here’s an overview of what you might find per serving of this scrumptious Beef Chili Mac Skillet (this would be a rough estimate):
- Calories: 600
- Protein: 35g
- Fat: 25g
- Carbs: 55g
And there you have it, friends! The Ultimate Beef Chili Mac Skillet is a fantastic dish to make for family dinners or meal prep for a busy week ahead. I can’t wait for you to try it! Whether you’re enjoying it with friends or savoring it solo, this dish is bound to become a new favorite in your kitchen.
Let’s scroll less, cook more, and make something unforgettable!
— Lila 🍴✨