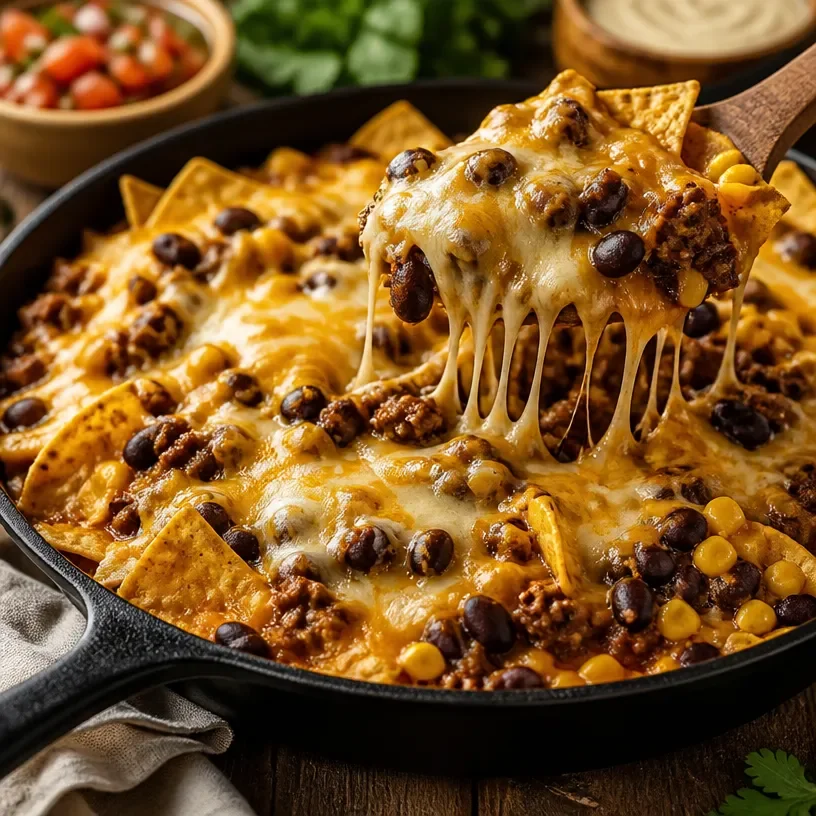
Loaded Nacho Skillet: A Crowd-Pleasing Delight
Hey there, fellow food lovers! Welcome back to the flavor-filled world of FoodieScroll, where we dive into delicious recipes that are simple, fun, and absolutely drool-worthy. Today, we’re whipping up something that’s not just a treat for the taste buds but also a feast for the eyes—Loaded Nacho Skillet! This dish is perfect for game nights, lazy weekends, or whenever you’re craving something extra cheesy and satisfying.
But before we get our cooking aprons on, let me share a little story that inspired this recipe.
A Walk Down Memory Lane with Loaded Nachos
I’ve loved nachos since I was a kid. Every summer, my family would take a trip to the beach. One of our favorite traditions was the “Nacho Night” at our beach house, where we’d gather around the table with fresh tortilla chips, melted cheese, spicy jalapeños, and all the toppings we could find. My brother and I would compete to see who could stack the highest pile of toppings on our chips—often resulting in a nacho tower that was more of a mess than a meal.
Those memories come flooding back every time I whip up a loaded nacho dish, and this skillet version takes me right back to those carefree days. It’s the perfect blend of nostalgia and modern flair that will have my friends and family asking for seconds and thirds!
Ingredients
Let’s dive into the star-studded lineup of ingredients we need for this Loaded Nacho Skillet:
-
2 lbs lean ground beef
Tender and flavorful, ground beef is a classic choice for nachos. If you prefer a lighter option, feel free to swap it out for ground turkey or even a plant-based meat substitute—there are great options available! -
1 packet taco seasoning
This seasoning is a game changer! It brings all the zesty flavors of taco night without the fuss. If you’re feeling adventurous, try making your own blend with cumin, paprika, garlic powder, and chili powder. -
1 cup queso dip
Creamy, melty goodness! Queso dip is what really takes this dish to the next level. You can use store-bought varieties or make your own if you’re up for it! Just remember, not all queso is created equal; look for one with a good melt. -
1 can black beans
Rich in protein and fiber, black beans add a hearty component to our nachos. Plus, they taste amazing! If you want to mix it up, pinto beans or refried beans work just as well. -
1 cup corn
Sweet and crunchy, corn adds a beautiful pop of color and flavor. If fresh corn isn’t in season, canned or frozen corn are perfect substitutes! -
2 cups tortilla chips
The foundation of our nacho heaven! Choose your favorite brand or even make your own by frying or baking tortillas. The sturdier the chip, the better; we’re going for a loaded experience here! -
1 cup Monterey Jack cheese
This cheese melts beautifully and has a mild flavor that complements the spice. If you’re looking for a bolder twist, try using sharp cheddar or pepper jack for an extra kick.
Step-by-Step Instructions
Are you ready to bring those nacho dreams to life? Let’s get cooking!
Step 1: Brown the Ground Beef
In a large skillet over medium heat, add the ground beef. Cook it until it’s browned, breaking it up with a spatula as you go. This should take about 6-8 minutes.
Chef Tip: Drain excess fat if necessary! You want the ground beef to be flavorful, not greasy.
Step 2: Add Taco Seasoning
Once the beef is browned, sprinkle the taco seasoning over it, followed by a little splash of water (about ¼ cup) to help the spices stick. Stir well to coat the meat evenly, and let it simmer for another 2-3 minutes until everything is well combined.
Why this matters: This step makes sure every bite is packed with flavor!
Step 3: Mix in the Veggies
Add the black beans and corn to the skillet. Stir everything together gently so the beans don’t get mashed. Allow it to heat through for an additional 3-4 minutes.
Hack Alert: If you want to sneak in some more veggies, finely chop bell peppers or jalapeños and toss them in during this step.
Step 4: Layer the Nachos
Now, here comes the fun part! Spread half of the tortilla chips evenly across the skillet—don’t worry if they overlap a little. Next, pour half of the queso dip over them, followed by half of the ground beef mixture, and a sprinkle of Monterey Jack cheese on top.
Feel free to get creative here!
Step 5: Repeat the Layers
Repeat the layering process with the remaining tortilla chips, queso dip, ground beef, and finish it off with the rest of the Monterey Jack cheese. This will ensure that every layer is packed with flavor!
Step 6: Bake It
Preheat your oven to 350°F (175°C). Transfer the skillet to the oven and bake for about 10-15 minutes, or until the cheese is bubbly and golden.
Note: Watch it closely—you want that delightful melty cheese without overdoing it!
Serving Suggestions
Once you pull that gorgeous skillet from the oven, let it cool for a minute or two (if you can resist!). Grab your favorite toppings—sour cream, fresh cilantro, diced avocado, or sliced jalapeños—and serve it straight from the skillet. Not only does it save on clean-up, but it also adds a rustic touch!
For a fancy twist, you can drizzle some homemade salsa verde or a squeeze of lime juice over the top just before serving. It’s all about those beautiful finishing touches!
Recipe Variations
Here are a few fun ways to mix things up with your Loaded Nacho Skillet:
-
Veggie Lover’s Delight: Swap the beef for a mix of sautéed zucchini, mushrooms, and bell peppers for a plant-packed version.
-
Spicy Nachos: Add sliced jalapeños into the mix, or use spicy queso to crank up the heat.
-
Sweet and Savory: Incorporate some diced pineapple or mango to add a sweet touch that pairs beautifully with the savory flavors.
-
Mushroom Madness: Use sautéed mushrooms as the base instead of ground meat; they add a rich, earthy flavor.
-
Cheesy Bliss: Don’t limit yourself to just Monterey Jack—try blending in some blue cheese or feta for a unique flavor twist.
Chef’s Notes
This Loaded Nacho Skillet recipe has become a staple in my home because it’s so versatile and forgiving. It started as an impromptu dinner one evening, and I’ve tweaked it over the years to get it just right.
One of my favorite tweaks? Adding a few drops of hot sauce to the ground beef during cooking. It adds depth and a subtle heat that keeps you coming back for more!
And you know what? It’s actually become a family tradition to make this on Friday nights, transitioning to a game night party dish that friends request on repeat. Who knew nachos could bring folks together like that?
FAQs and Troubleshooting
Q: My nachos turned out soggy; what happened?
A: Soggy nachos usually happen when too many wet ingredients are piled on top. Make sure to layer strategically and use sturdier tortilla chips!
Q: Can I prepare this in advance?
A: Absolutely! You can cook the beef and mix the ingredients in advance, then layer them before baking. Just remember to refrigerate them and bake them right before serving.
Q: What if I don’t have a skillet?
A: No worries! Use an oven-safe baking dish instead, or even a foil tray. Just ensure it’s deep enough to hold all those fabulous ingredients!
Q: Can I freeze leftovers?
A: Yes! Simply cool completely, then store in an airtight container. Reheat in the oven to crisp things back up!
Nutritional Info
While I believe in enjoying food without guilt, being aware of what we eat can help maintain balance. Here’s a quick breakdown per serving (based on 8 servings):
- Calories: Approx. 480
- Protein: 30g
- Fat: 30g
- Carbohydrates: 32g
- Fiber: 6g
(Always double-check based on the specific brands and ingredients you use!)
Conclusion
And there you have it—a delicious Loaded Nacho Skillet recipe that’s sure to impress! It’s simple, fun, and packed with flavors that remind me of cherished memories. Whether you’re serving it up for friends or treating yourself on a cozy night in, this dish is bound to be a hit.
So grab those ingredients, channel your inner chef, and let’s make something unforgettable together! Happy cooking! 🍽️✨
Feel free to explore the site for more mouthwatering recipes, and don’t forget to share your Loaded Nacho Skillet adventures with us! Let’s scroll less and cook more, my foodie friends. 🤗