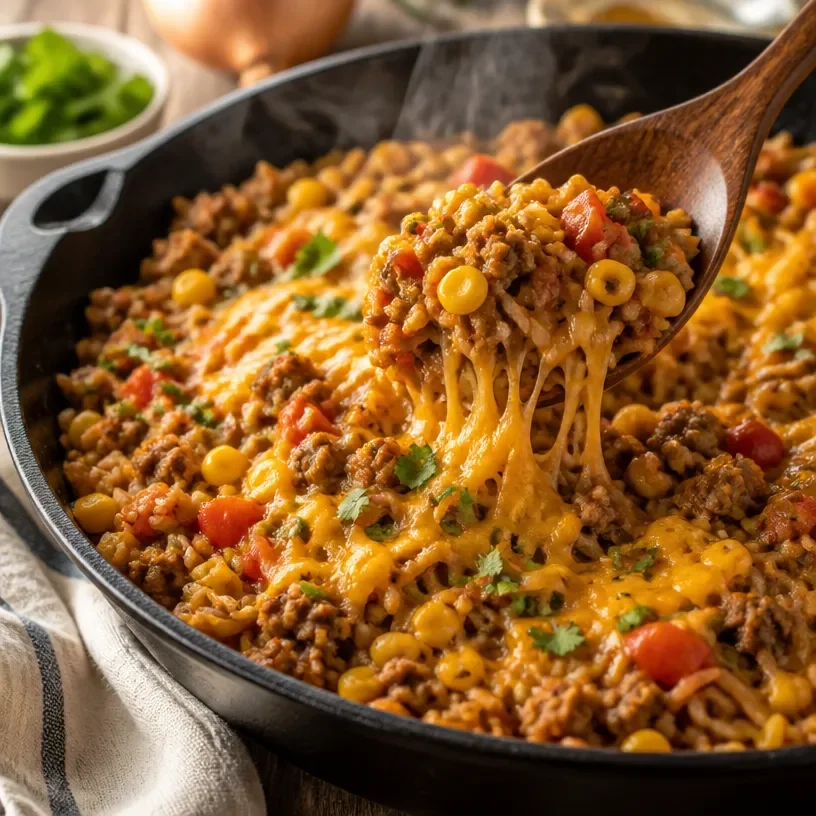
Your New Favorite One-Pan Wonder: Mexican Rice Skillet
Hey there, food lovers! Get ready to dive into a culinary adventure with me today as we whip up a delightful dish that’s both easy and flavorful: the Mexican Rice Skillet. This recipe is perfect for busy days when you crave something comforting but don’t want to spend hours in the kitchen. Plus, it’s all made in one pan, which means less cleanup—yay!
The combination of savory ground beef, zesty spices, and the sweet pop of corn will have your taste buds dancing. So grab your apron, and let’s get started!
My Love for Cooking and the Inspiration Behind This Dish
Ah, the memories! One of my favorite kitchen experiences growing up was Saturday nights at my grandma’s house. The kitchen would be buzzing with energy and the tantalizing aroma of spices wafting through the air. Grandma would spend two hours preparing her famous Mexican rice and ground beef dish, stirring away with love and laughter echoing around her.
Fast forward to today—while I don’t have two hours to spare for cooking on most days, I cherish the flavors and heart behind that classic recipe. So, I created this Mexican Rice Skillet that captures those nostalgic tastes and feelings we all love, but in a fraction of the time! Trust me, once you try this recipe, you’ll be transported to that warm, cozy kitchen with every bite.
Ingredients
Here’s what you’ll need to bring this dish to life:
-
2 lbs lean ground beef: This is your protein base! If you’re looking for a healthier twist, try using ground turkey or chicken instead. You can even go vegetarian by substituting mushrooms or lentils for a delightful meaty texture.
-
1 onion, diced: Onions add a sweet and savory depth to the dish. If you’re into a bit of game, shallots or green onions can provide a unique twist.
-
1 cup long-grain rice: The heart of your skillet. Opt for brown rice for a nuttier flavor and more fiber, but remember, it’ll slightly change the cooking time.
-
2 cups beef broth: Adds richness and depth! Swap for vegetable broth if you’re going for a meatless version. I love jazzing it up with a homemade broth, but store-bought works just fine!
-
1 can diced tomatoes: For a burst of color and acidity. If you enjoy heat, consider using fire-roasted tomatoes or tomatoes with green chilies for a kick.
-
1 cup corn: Sweet corn brings a fantastic pop of flavor and texture. Frozen corn works just as well here and can easily be tossed in without any thawing.
-
1 tsp cumin: The magic spice that gives the dish its heartwarming aroma. If you’re feeling adventurous, add a pinch of smoked paprika for a smoky twist.
-
1 cup cheddar cheese: Because everything’s better with cheese! Feel free to mix it up with your favorite cheese—Monterey Jack or pepper jack can add an exciting zing!
Step-by-Step Instructions
Let’s get cooking! Follow these simple steps to create our flavorful Mexican Rice Skillet:
-
Brown the Beef: In a large skillet, over medium heat, add the ground beef. Use a wooden spoon to break it up into crumbles. Cook until browned, about 5-7 minutes. When the meat is nearly finished, season it with a pinch of salt and pepper to enhance the flavors right from the start.
-
Add the Onion: Toss in the diced onion and stir it into the beef. Cook until the onion is softened and translucent, about 3-4 minutes. This step adds that lovely aromatic flavor—don’t skip it!
-
Incorporate the Rice: Stir in the long-grain rice and toast it lightly in the skillet for about a minute. This will give it a delightful nuttiness and will enhance its flavor as it cooks.
-
Pour in the Broth and Tomatoes: Add the beef broth and diced tomatoes to the skillet. Stir to combine everything. The liquid will cook the rice and create the saucy base we love.
-
Season with Spices: Sprinkle in the cumin (and smoked paprika if you’re using it) and demonstrate some love by mixing it in thoroughly. This is where the delicious aroma starts to fill your kitchen!
-
Add the Corn: Fold in the corn for sweetness and texture. Continue to stir until everything is nicely incorporated.
-
Bring to a Simmer: Raise the heat until the mixture starts to simmer. Then, reduce the heat to low, cover the skillet, and let it cook for about 20-25 minutes until the rice is tender. Keep peeking occasionally—no one wants burnt rice!
-
Melt the Cheese: Once the rice is fully cooked, remove the lid and sprinkle the cheddar cheese on top. Cover again for just a few minutes until the cheese is melty and gooey.
-
Serve It Up!: Once the cheese is melted to perfection, give everything one last stir and serve hot.
Serving Suggestions
Plating is everything, right? Here are some fun ways to serve your Mexican Rice Skillet:
-
In a Bowl: Serve it in a deep bowl, garnish with fresh cilantro and a squeeze of lime for brightness.
-
Taco Style: Load the rice into warm tortillas for a delightful taco night twist! Add toppings like avocado slices, salsa, or sour cream.
-
Family Style: Serve from the skillet on the dining table. Let everyone scoop out their portions and dig in. Perfect for a communal dinner vibe!
Recipe Variations
The beauty of this Mexican Rice Skillet is its versatility! Here are a few ways to switch things up:
-
Spicy Kick: Add diced jalapeños in with the onions for an extra punch.
-
Bean Lover’s Variation: Mix in a can of black beans or pinto beans for additional protein and fiber—perfect for those vegetarian dinners!
-
Southwest Chicken Skillet: Substitute the beef with shredded rotisserie chicken for an easy shortcut on busy nights.
-
Veggie Loaded: Sneak in some bell peppers or zucchini along with the onions for a colorful veggie boost.
-
Cheesy Enchilada Style: Mix in some enchilada sauce instead of broth for a richer, saucy flavor!
Chef’s Notes
You know, every recipe has its own story, and for me, this one evolved from a classic that my friends would often request. Over time, I started tweaking the ingredients, adding seasonal veggies, or sometimes swapping proteins depending on what I had in my fridge.
I remember one frantic night, realizing I had no beef on hand—so I improvised with leftover grilled chicken and added black beans for a protein punch. That one-pot meal turned out to be a huge hit, and it has since remained in our rotation.
Don’t be afraid to make this dish your own! Cooking is about expressing yourself and sharing love through food.
FAQs and Troubleshooting
Here are some common questions you might have while making your Mexican Rice Skillet:
-
Why is my rice still crunchy?
If your rice is crunchy, it probably needs more liquid. Add a splash of broth or water, cover, and let it simmer a little longer. -
Can I make this ahead of time?
Absolutely! You can prepare the whole dish ahead of time, store it in an airtight container, and reheat it when you’re ready to eat. It often tastes even better the next day! -
How do I store leftovers?
Store any leftovers in an airtight container in the refrigerator for up to 3-4 days. You can also freeze it for longer storage, just remember to pack it in freezer-safe containers! -
Is there a substitute for ground beef?
Yes! Ground turkey, chicken, tofu crumbles, or even lentils can work wonders in this skillet for a lighter or vegetarian option.
Nutritional Info
While I believe in enjoying the food that you love, here’s a quick glance at the nutritional value for this dish (per serving based on 6 servings):
- Protein: 30g
- Carbohydrates: 40g
- Fat: 15g
- Dietary Fiber: 4g
- Sugars: 3g
Remember, nutritional values can vary based on specific brands and variations used!
Conclusion
And there you have it, folks! A cozy, delicious, and hassle-free Mexican Rice Skillet that’s sure to satisfy cravings and warm hearts. With its easy steps and customizable flair, this dish is bound to become a family favorite around your dinner table.
So, what are you waiting for? Gather your ingredients, throw on your favorite playlist, and let’s get cooking! Remember, cooking doesn’t have to be complicated—it should be fun and full of flavor. Until next time, keep scrolling less, cooking more, and loving every bite.
— Lila 🍴✨