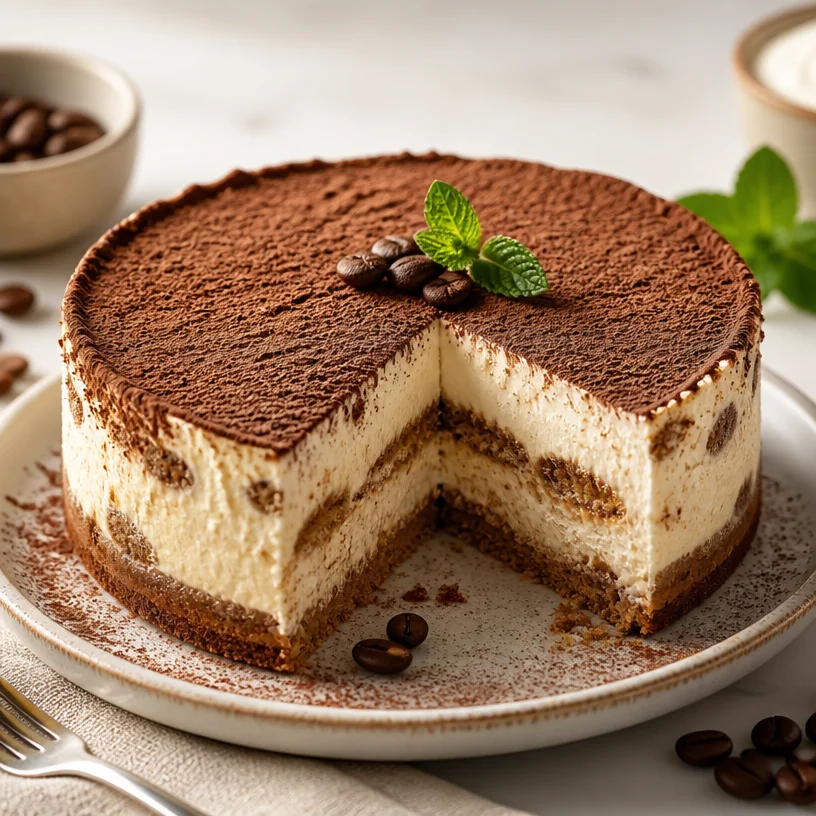
Indulge in a Healthier Twist: Protein Luxury Tiramisu Cheesecake
Hello, lovely foodies! 🌟 It’s Camille from Crunchy Table. Today, I’m about to take your taste buds on a delightful journey with my Protein Luxury Tiramisu Cheesecake. Picture this: rich, creamy cheesecake layered with the classic flavors of tiramisu, but with a healthy twist that doesn’t hold back on taste. Yes, you can indulge AND maintain a balanced lifestyle!
A Sweet Trip Down Memory Lane
When I think of tiramisu, I can’t help but recall those cozy evenings spent at my grandma’s house, with the warm scent of coffee wafting through the air. Grandma would whip up her famous tiramisu, layering delicate ladyfingers soaked in espresso and creamy mascarpone, the perfect treat to end family dinners. It wasn’t just a dessert; it was a ritual, a shared moment of joy.
But as I grew older, I realized how rich traditional tiramisu could be. While my love for it never faded, my waistline started to protest! 😅 That’s when I decided to reinvent this classic by creating a version that’s just as satisfying, minus the heavy calories. The Protein Luxury Tiramisu Cheesecake was born! It’s lighter, packed with protein, and gives you that luscious taste of simple indulgence without the guilt.
Are you ready to make this magical cheesecake? Let’s dive in!
Ingredients
This recipe is all about selecting the right components for that luscious flavor with a protein boost! Here’s what you’ll need:
-
1 cup Greek yogurt or cottage cheese
Creamy and full of protein, Greek yogurt will give your cheesecake that delightfully smooth texture. Cottage cheese is also a lovely alternative if you prefer a bit of that cottagey taste. -
½ cup protein powder (vanilla or coffee flavored)
This is where the magic happens! The protein powder not only boosts the nutritional profile but also adds a flavorful touch. Choose your favorite flavor; it can really change the vibe of the cheesecake! -
8 oz light cream cheese
A lighter version of traditional cream cheese, it gives you creaminess without the heavy calories. You could also go for vegan cream cheese if you want a dairy-free option. -
⅓ cup natural sweetener (like honey, maple syrup, or monk fruit)
You’re in control of the sweetness level! I love using maple syrup for its warmth and depth, but honey or monk fruit works wonders as well. -
1 tablespoon espresso powder
This little nugget of joy gives that authentic tiramisu flavor! If you’re not a fan of espresso, try swapping this for strong brewed coffee. -
1 teaspoon vanilla extract
Just a dash adds beautifully to the overall flavor profile, making it feel homemade and comforting. -
1 tablespoon cocoa powder (for dusting)
The classic finishing touch of tiramisu! You could even experiment with flavored cocoa for added depth.
Step-by-Step Instructions
Let’s get that cheesecake in the making! Follow these simple steps, and trust me; you’ll be rewarded with a dessert that even grandma would approve of!
-
Prepare the base
First, grab a springform pan (it’s the secret to easy cheesecake removal!) and line the bottom with parchment paper for good measure. -
Blend your creamy goodness
In a mixing bowl, combine the Greek yogurt (or cottage cheese), light cream cheese, natural sweetener, protein powder, espresso powder, and vanilla extract. Use an electric mixer or a whisk; whisk away until the mixture is smooth and creamy—no lumps allowed! Little chef tip: If using cottage cheese, blend it in a food processor first for a super-smooth texture. -
Taste test
This is the fun part! Give your mixture a little taste. Adjust sweetness or the coffee flavor to your liking. Don’t worry; you’re doing a great job! -
Pour it into the pan
Carefully pour the creamy mixture into the prepared springform pan. Use a spatula to smooth the top. You want it to look inviting! -
Chill the fun
Cover the cheesecake with plastic wrap and let it set in the fridge for at least 4 hours (or preferably overnight). This allows the flavors to meld together beautifully. It’ll be soooo worth the wait. -
Dust with cocoa
When you’re ready to serve, remove the cheesecake from the pan. Dust the top with cocoa powder using a fine-mesh sieve for that classic tiramisu finish. -
Slice and enjoy
Cut into wedges and plate up! Pair with a dollop of Greek yogurt or a sprinkle of coffee beans if you’re feeling fancy.
Serving Suggestions
Ready to dazzle your guests? Here are some creative ideas for serving!
- Presentation is everything: Serve slices on colorful plates and sprinkle a little more cocoa or even some chocolate shavings.
- Garnish with fresh berries: A handful of raspberries or strawberries can be a lovely contrast to the deep coffee flavor.
- Pair it with a side: Serve with a cup of espresso or a mocktail made with sparkling water and citrus for a refreshing kick.
Recipe Variations
How about switching it up a bit? Here are a few twists that you can experiment with:
-
Chocolate Delight
Incorporate some melted dark chocolate into the cheesecake base for a more decadent chocolate tiramisu twist. -
Nutty Bliss
Add crushed nuts (like hazelnuts or almonds) to the cheesecake for an extra crunch layer and a delightful nutty flavor. -
Fresh Fruit Layer
Layer the cheesecake with a thick layer of fresh banana or strawberries in between if you want a fruity explosion! -
Dairy-Free Option
Go completely dairy-free by swapping dairy cream cheese with a vegan option and use a plant-based yogurt. -
Coffee Harmony
For a stronger coffee flavor, replace part of the liquid sweetener with rich coffee to intensify the taste.
Chef’s Notes
Oh, how this recipe has evolved over time! Initially, I wanted to make a protein-packed treat, but as I kept testing, family and friends would eagerly pop by to taste-test. Their enthusiasm really made me realize how nostalgia blends with modern health consciousness. Cheers to recreating memories and making new ones in the kitchen!
A funny kitchen story: One time, I misread the espresso powder measure and accidentally dumped in a tablespoon instead of a teaspoon. Let me tell you, the cheesecake had a serious coffee jolt! ☕️ But guess what? Everyone ended up loving the extra kick! Total win!
FAQs and Troubleshooting
Got some burning questions? I’ve got answers!
Q: My cheesecake didn’t set properly; what happened?
A: Make sure you let it chill long enough! Sometimes the flavors need more time to stabilize. If that happens again, you can pop it in the freezer for a bit, but well-chilled is usually the best way to go.
Q: Can I freeze the cheesecake?
A: Absolutely! Just wrap it tightly in plastic wrap and place it in the freezer. Defrost overnight in the fridge when you’re ready to enjoy it again.
Q: How do I know when it’s done chilling?
A: If it holds its shape when you gently press the top, you’re good to go!
Q: What if I don’t have a springform pan?
A: You can use a regular cake pan, but be sure to line it well with parchment paper for easy removal.
Nutritional Info (if applicable)
This heavenly indulgence is not just delicious; it’s also packed with protein! While specific nutritional information can vary based on ingredients used, here’s a general overview:
- Calories: Approximately 150-200 calories per slice.
- Protein: About 12-15 grams per slice.
- Carbs: Roughly 15-20 grams per slice.
- Fat: Around 5-7 grams per slice (depending on your cream cheese choice).
Now, who said healthy can’t be tasty and satisfying? Ready to impress your taste buds? Let’s get in that kitchen and whip up this Protein Luxury Tiramisu Cheesecake together! I can’t wait to hear how your version comes out. Happy cooking! 🍰💚✨